I am so excited about today's post! My next door neighbor, Bridget of Bake at 350 is not only adorable and classy, she has become my friend (remember when we met?) and if I need a cup of sugar, I think I'm all set.
Don'tcha think?
Because, hello, have you seen her cookies?
Oh, it gets better, you can actually taste them in her Etsy bake shop.
And I live for her "mistakes."
Since her mistakes are 100 times better than my cookies on a good day, I give you:
Hi, We Are THAT Family readers!!! I am so tickled to be here today. I'm even more tickled that I live NEXT DOOR to Kristen (how lucky is THAT) and that she invited me to guest post today.
Cookies are the ultimate DIY gift! Who doesn't love a cookie? They make perfect gifts for teachers, neighbors, friends and family.
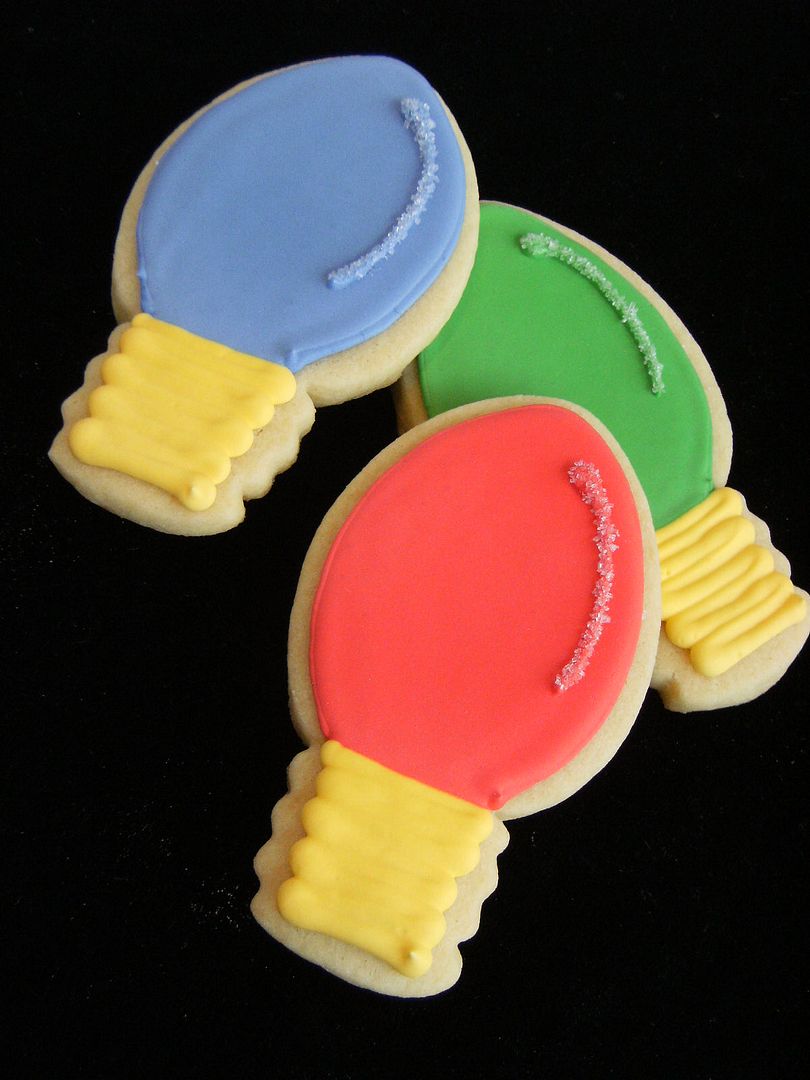
I'm going to share with you a simple and fun decorated Christmas cookie idea.
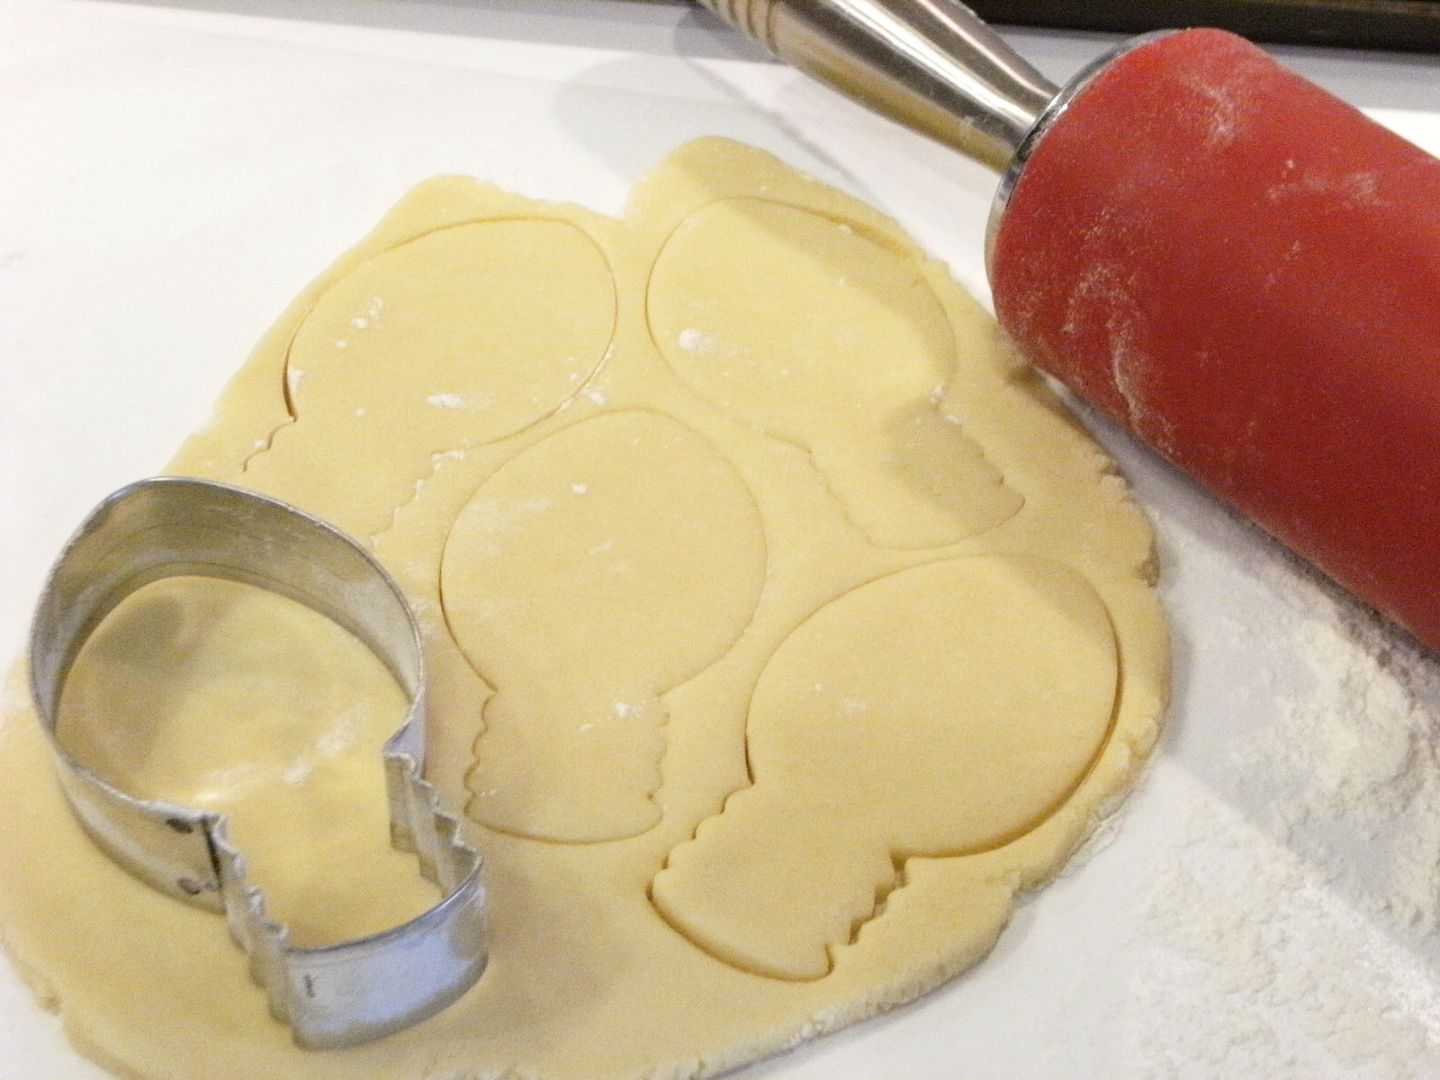
First, you'll need a Christmas light cookie cutter (check craft stores, kitchen stores and even the grocery store) and cookie dough. Here is the recipe I use, but I won't tell if you buy it from Pillsbury. ;)
Once your cookies are cooled, make up a batch of royal icing and tint in the colors you'd like. (I used AmeriColor Gel Paste food colorings in egg yellow, super red, leaf green and regal purple.)
Now the fun begins:
- With a #4 icing tip, use a zig-zig motion to make the light bulb base in yellow (AmeriColor Egg Yellow).
- Using a #2 tip, outline the bulb shape in color of your choice.
- Thin the bulb color icings with water, a little at a time and stirring, until they reach the consistency of thick syrup. Cover with a damp cloth and let rest several minutes.
- One color at a time, stir gently to break up large air bubbles that have risen to the surface. Transfer icing to a squeeze bottle.


{I work about 3 cookies at a time when filling.}
- Fill (or flood) in the outlined area. Use a toothpick to guide into edges and fully cover.
- Let dry at least one hour.
- Again with the #2 tips, add a little curved line for detail on the bulb.

Stop here, they are perfectly cute OR the next day....

...mix a little meringue powder with water and paint it (with a child's paintbrush) on the line detail and shake on sanding sugar (turn upside down to remove excess)....

...OR, coat the entire bulb with the meringue powder/water mixture and shake on sanding sugar.
OK, who's ready to make some cookies?!?

27 comments:
makes me hungry just looking, but they are SO adorable...I MIGHT have a hard time biting into it....;)
suzanne
LOVELY! I only wish I had the patience!
Ph you make that sound so easy...yet I'm still scared. :-) Gorgeous cookies.
love love love!
I'm coming to visit you two....and get some personal cookie making lessons!
WOW!! I have never been so impressed by cookies before!!! I'd not want to eat them because they are so beautiful!
Great post, you are both lucky to be neighbors :)
Oooh they look so yummy!
Wow those are amazing!! I never knew how to decorate cookies to make them have that smooth look! Lovely!
Absolutely gorgeous as usual!
Dang it now I want to bake cookies...
Thanks Bridget! I actually bought a lightbulb cookie cutter this year! now I know how to decorate them all cute like! ♥
~TidyMom
Are there any houses for sale in your neighborhood? If so, I'm there! lol
I think I might make these for teachers this year :)
Great, Im going to try these!
these are so cute Bridget!!
And so easy.. these are a great starter cookie!
Those are sooooo awesome!!
I love both your blogs, and I'm so happy to see you've joined forces for a post! Thanks! Great looking cookies.
Those are absolutely adorable! You have one talented neighbor. I seriously need to meet her (and eat her cookies) next time I visit.
AMAZING!
This is such a great idea! I'm definitely interested in making these with my niece and nephews this Christmas!
These are so cute! I so wish I had the patience to decorate sugar cookies!
how do you like your silicone covered rolling pin?? i've been considering investing in one of those and wonder if they're worth it.
Leslie...I love it! It was a gift from my DAD and I use it every time I make cookies (a lot)! :)
Oh my...your neighbor is so talented! Love it!
thanks for the cookie decorating lesson. So neat......
OH MY GOSH these are fantastic!! I wish I knew WHAT IN THE WORLD you were talking about with #2 tips and meringue something and sanding sugar. Sounds impossible to do because I don't know what it all is, but I Sure do what to try though!!
These look so good & I bet they taste even better! :D
These are the cutest things!! I love the Christmas light cookie cutter!
Post a Comment